A high-quality HDPE geomembrane is the heart of a modern containment system, but the material itself is only half the story. The most common cause of failure we see in the field isn't a faulty product, but a flawed installation. A single bad weld can compromise the integrity of an entire project.
This comprehensive guide delivers a step-by-step procedure for HDPE geomembrane installation and welding, based on our experience supplying global projects. We will cover everything from initial site preparation and equipment selection to detailed welding techniques, rigorous quality control, and critical safety measures, ensuring your project achieves long-term, leak-free performance.
Before the first panel is unrolled, it's crucial to understand why this process demands such precision and to have the right tools ready for the job.
1. Introduction: The Role of HDPE Geomembranes in Containment Projects
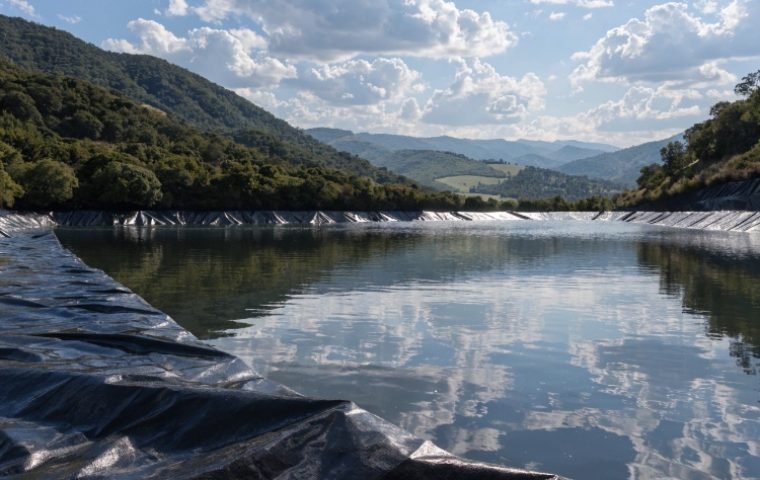
Babban Maɗaukaki Polyethylene (HDPE) geomembranes are the material of choice for the world's most demanding containment applications, from landfill liners and mining heap leach pads to reservoir and canal linings. Their dominance stems from an exceptional combination of properties: superior chemical resistance, excellent durability against UV exposure, and an incredibly low permeability. These characteristics make HDPE the most reliable barrier for protecting the environment from contaminants.
Koyaya, waɗannan kaddarorin injiniyoyi ana samun su ne kawai lokacin da aka haɗa nau'ikan nau'ikan guda ɗaya don samar da takarda guda ɗaya, mai ci gaba, da mara ƙarfi. Ana samun wannan ta hanyar thermal Fusion waldi. Ba kamar sauran kayan da za'a iya mannawa ko tef ɗin ba, tsarin kwayoyin halitta marasa iyaka na HDPE yana sa haɗin gwiwa ba zai yiwu ba. Hanya daya tilo ta haifar da dindin din din din din din din din din din din din din din din din din din din din din din din din din din din din din din din din din din din din din din din din din din din din din din din din din), wanda ba zai iya zubar da ruwa ba ita ce ta narke saman tare karkashin kulawar zafi da matsa lamba. An sadaukar da wannan jagorar don sarrafa wannan tsari.
2. Muhimman kayan aiki da Kayan aiki don HDPE Geomembrane Welding
Showing up to a job site without the proper equipment is the fastest way to guarantee project delays and poor-quality work. A professional installation crew carries a specialized arsenal of tools designed for welding, testing, and handling HDPE geomembranes.

Welding Equipment
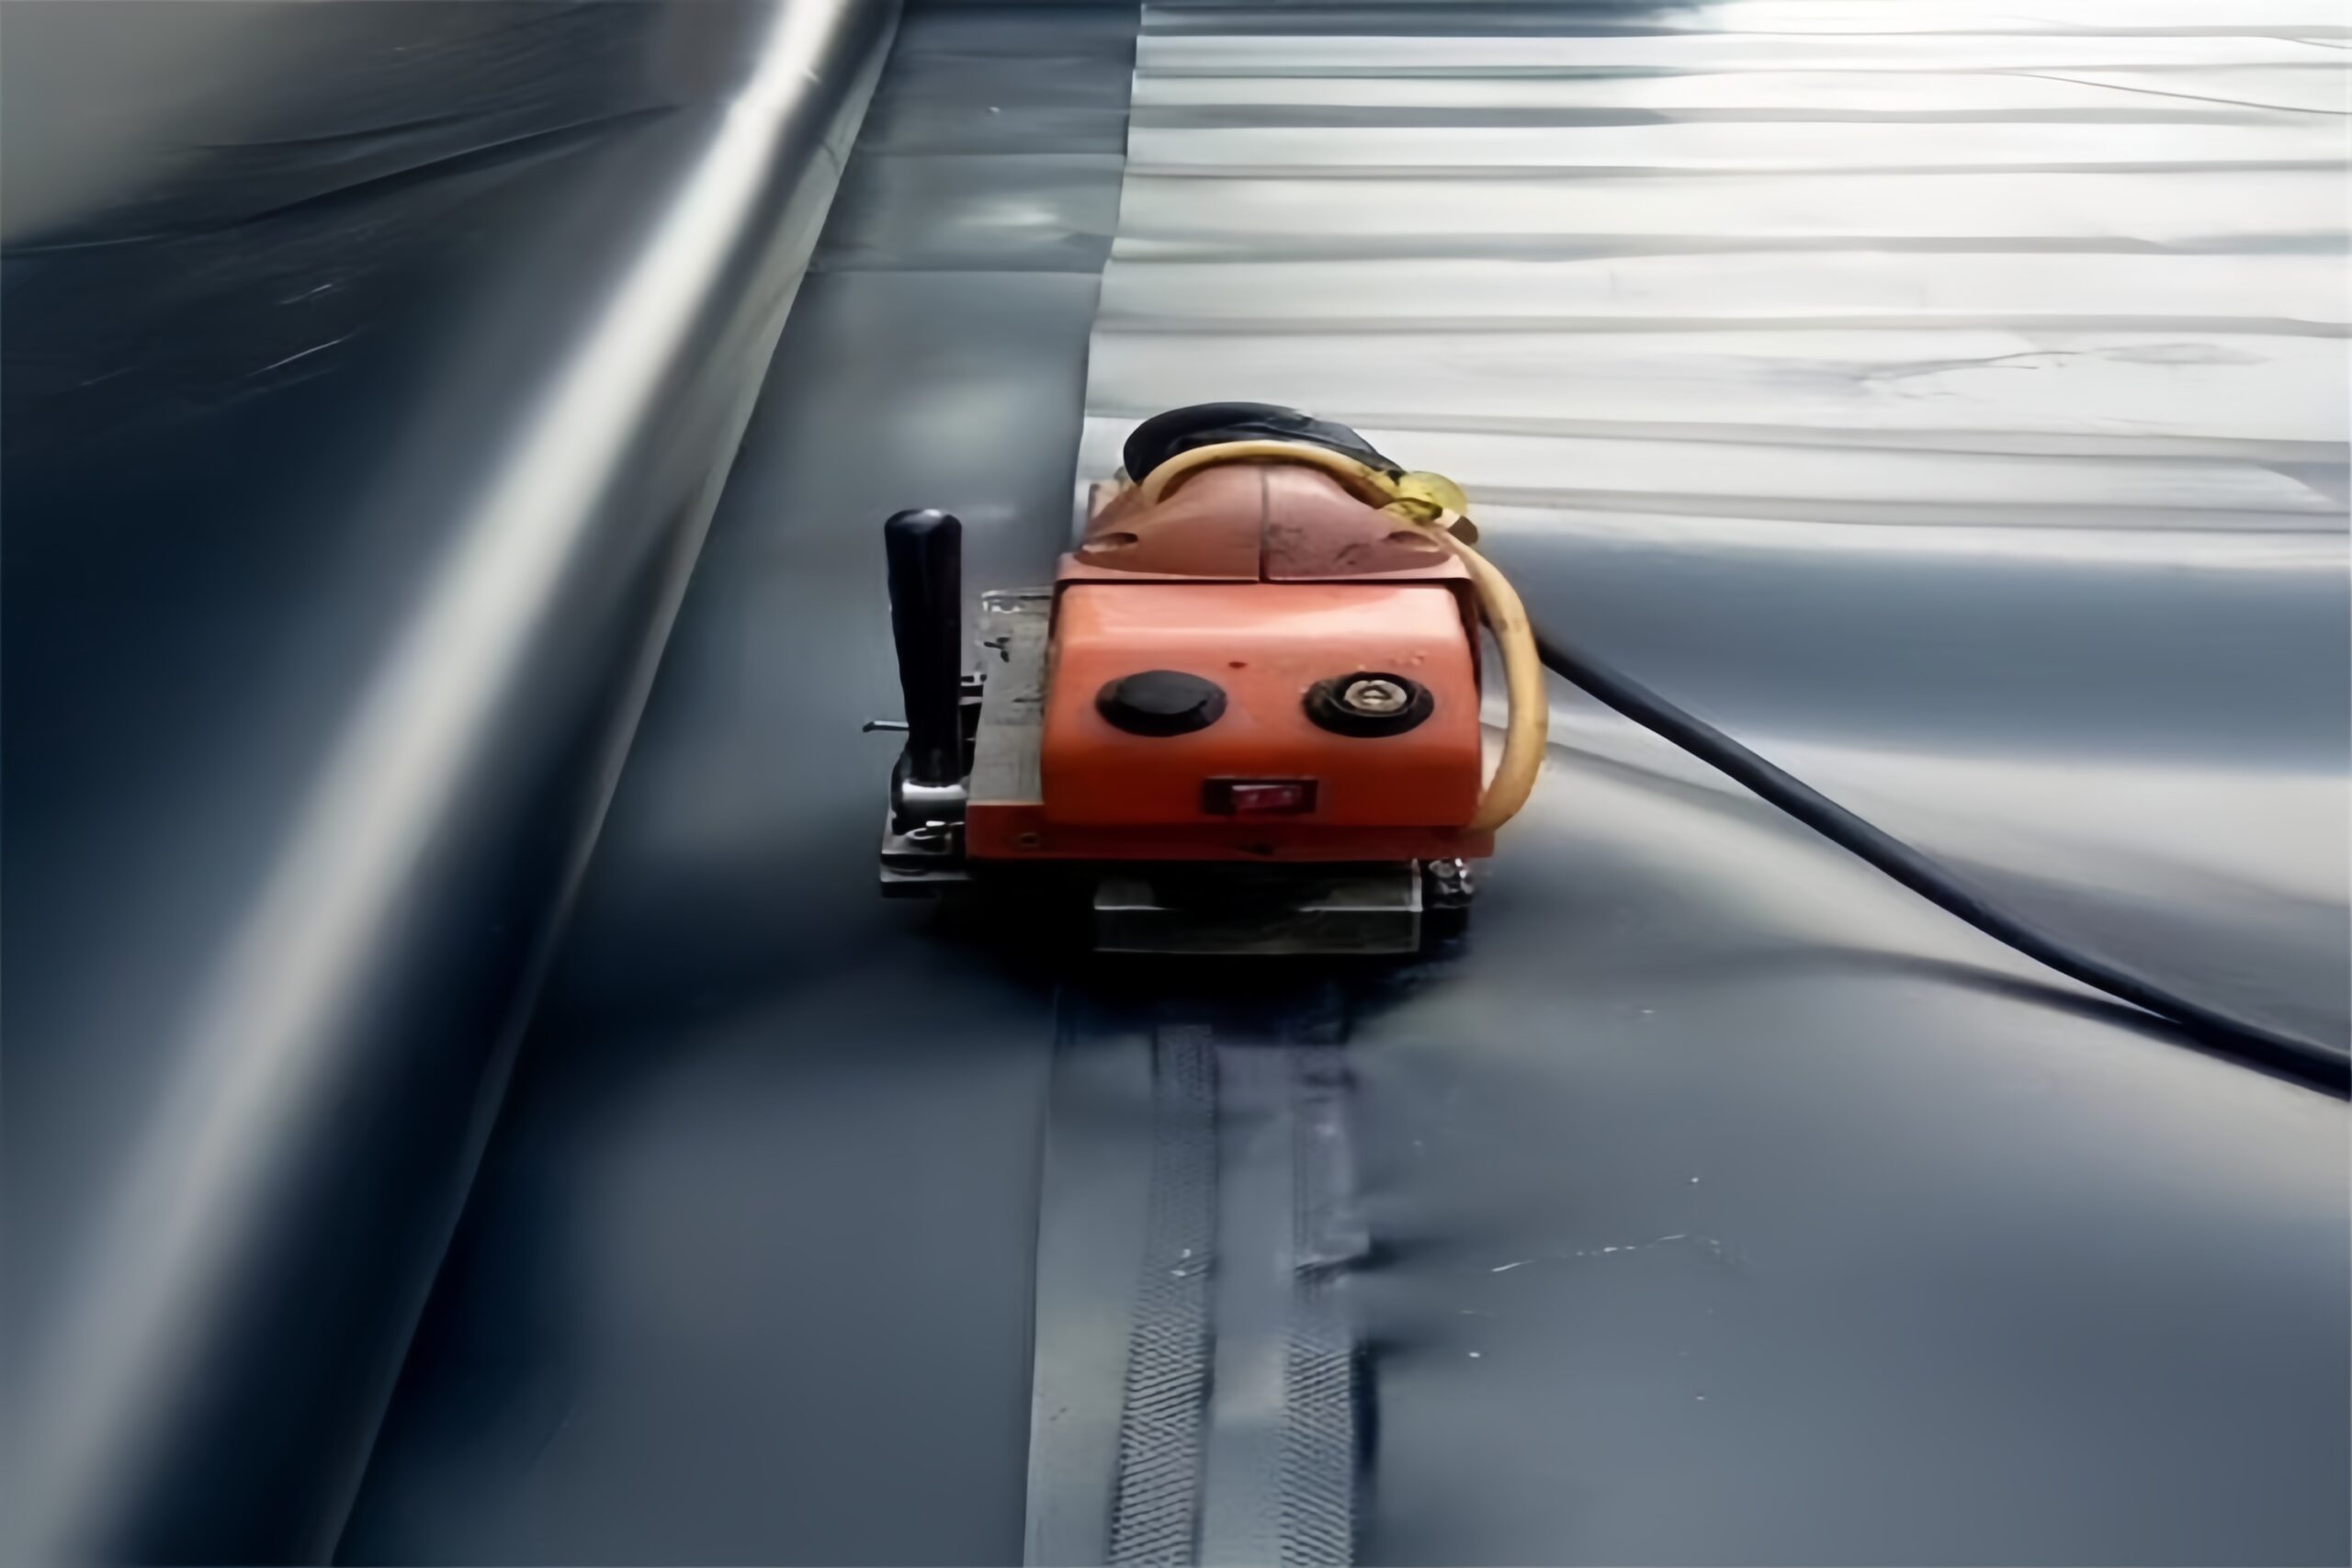
- Automatic Hot-Wedge Welder: Wannan shine dokin aiki na dogon, madaidaiciyar kabu. Yana amfani da ƙusa mai zafi don narkar da saman saman zanen geomembrane guda biyu yayin da rollers ke matsa lamba don haɗa su. Don mafi girman membranes (1.0 mm da sama), ana amfani da manyan samfura tare da rollers na ƙarfe don samar da isasshen matsa lamba. Don ƙananan membranes (a ƙasa 1.0 mm), ƙananan raka'a tare da rollers na roba da ƙananan ƙarfi an fi son su guje wa lalata kayan.
- Hannun Extrusion Welder: Wannan kayan aiki yana da mahimmanci don aiki daki-daki, gyare-gyare, da waldawa a cikin matsatsun wurare inda walda mai zafi ba zai iya aiki ba. Yana aiki kamar bindigar walda ta filastik, dumama sandar walda ta filastik da fitar da narkakkar katako na HDPE a kan yankin kabu don ƙirƙirar haɗin gwiwa mai ƙarfi, ci gaba. Ana amfani dashi don faci, takalman bututu, da bayanan kusurwa.
- Bindigan Jirgin Sama: An yi amfani da shi don walƙiya tack na wucin gadi don riƙe fale-falen a wuri kafin babban izinin walda kuma don ƙaramin aikin gyarawa.
Kula da Inganci da Kayan Gwaji
- Akwatin Vacuum: Akwati mai haske mai taushin gasket na roba, ana amfani da shi tare da kwampreso don yin gwaji mara lalacewa akan walda masu extrusion.
- Kit ɗin Gwajin Matsalolin Iska: Ya haɗa da ma'aunin matsi da allura don gwada amincin tashar iska a cikin walda mai-hanyoyi biyu.
- Tensiometer: A portable field device used to perform destructive peel and shear tests on trial weld strips, ensuring the welding parameters are correct.
General Tools
- Grinders for preparing surfaces before extrusion welding.
- Knives, shears, and measuring tapes.
- Sandbags for temporary anchoring.
- Cleaning supplies (rags and solvent if necessary, though water is often sufficient).
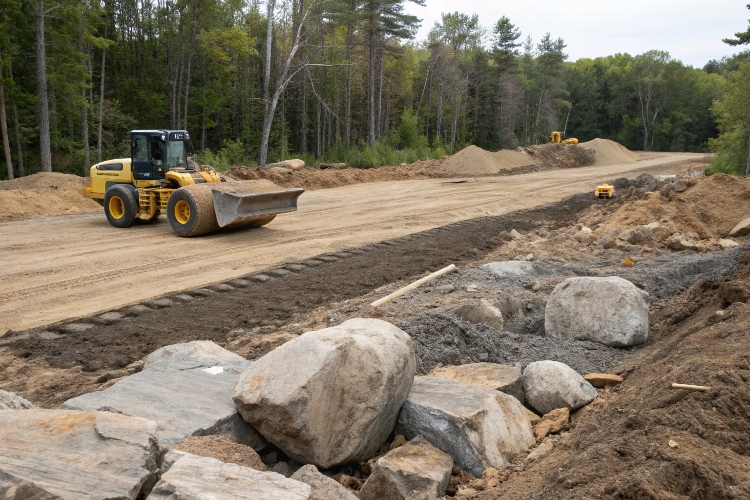
3. Preparation and Site Setup Before Welding
The success of a geomembrane installation is determined long before the first weld is made. Meticulous preparation is non-negotiable and provides the foundation for a durable, long-lasting liner system.
Shiri Subgrade
Ƙarƙashin ƙasa shine ƙasa ko tushe Layer wanda za'a sanya geomembrane akansa. Dole ne a shirya shi ya zama ƙasa mai santsi, tsayayye, da ƙasa mara jurewa. Tsarin ya ƙunshi:
- Bincike da Sharewa: Ana binciken yankin don tabbatar da ya dace da haɓakar ƙira. Duk ciyayi, manyan duwatsu, kututturen bishiya, saiwoyi, da tarkace dole ne a cire su gaba ɗaya.
- Ƙarfafawa: Ƙasar tana haɗawa da yawa da aka ƙayyade a cikin tsare-tsaren aikin. Wannan yana hana sasantawa na gaba wanda zai iya ƙarfafa layin.
- Ƙarshen Sama: The final surface must be smooth and free of any sharp objects. Any projections or coarse gravel that cannot be removed must be covered with a cushioning layer, such as a minimum 15 cm (6-inch) layer of sand. A final roll-over with a smooth-drum compactor ensures a uniform surface.
Geotextile Underlayment
In many applications, especially over rocky or questionable subgrades, a protective non-woven geotextile is installed directly on top of the prepared subgrade. This adds a critical layer of puncture protection, acting as a cushion between the soil and the HDPE liner. A geotextile with a minimum weight of 300 g/m² is common for this purpose.
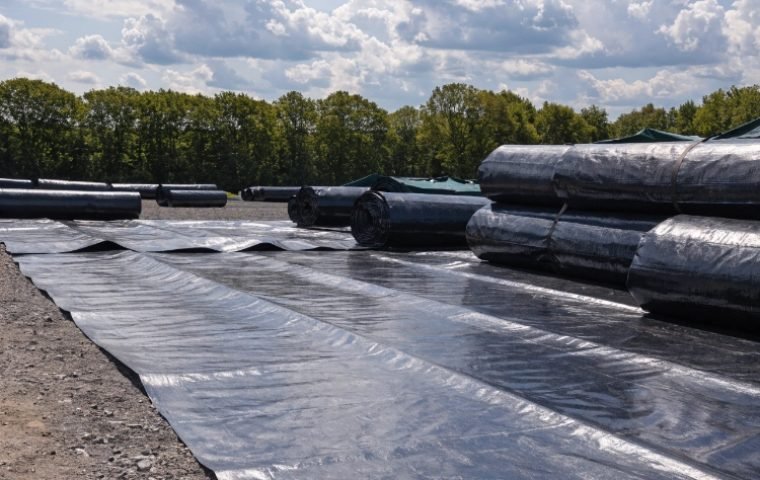
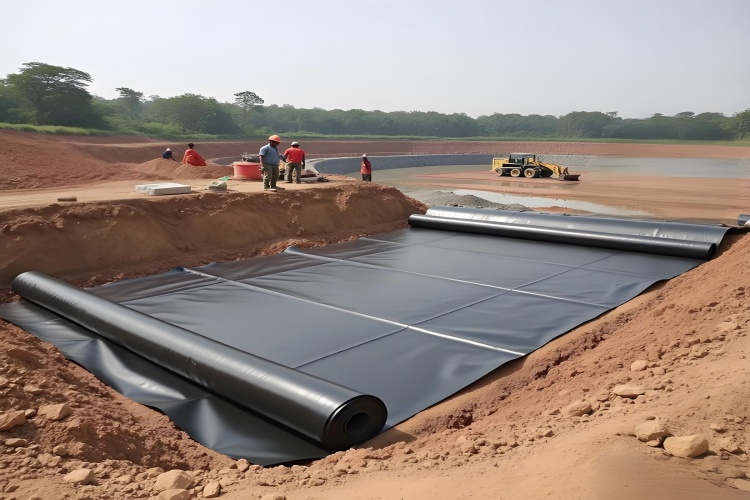
Panel Layout and Deployment
Tare da shirye-shiryen rukunin yanar gizon, ana tura sassan geomembrane bisa ga tsarin shimfidar kwamitin da aka amince.
- Yakamata a tura Rolls ta amfani da sandar shimfidawa a kan tono ko wasu kayan aiki don gujewa jan su a ƙasa.
- Ya kamata a yi aiki a cikin kwanakin kwantar da hankali don hana iska daga shiga ƙarƙashin zanen gado, wanda zai iya zama haɗari sosai.
- Ya kamata a sanya bangarori tare da abin da aka riga aka ƙaddara, yawanci 10-15 cm (inci 4-6), don ba da damar yin walda.
- Yana da mahimmanci a ƙyale wasu raguwa (3-5%) a cikin kayan don lissafin haɓakar zafi da raguwa, amma kauce wa ƙuruciyar ƙura, wanda zai iya haifar da matsala yayin waldawa da sake dawowa.
4. Mataki-mataki HDPE Tsarin Welding Geomembrane
Welding is a technical skill that requires training, precision, and constant attention to detail. The process can be broken down into two main methods: fusion welding for long seams and extrusion welding for detail work.
Fusion Welding (Hot-Wedge Method)
This is used for the primary field seams connecting the main panels.
- Seam Preparation: Ensure the overlap area is clean, dry, and free of any dust, mud, or moisture. The required overlap width (usually 10-15 cm) must be consistent.
- Trial Weld: Before starting production welding each day, and any time conditions change, a trial weld must be performed on scrap pieces of the project's geomembrane. This test strip is then cut and tested with a field tensiometer to verify that the welder's temperature, speed, and pressure settings are correct.
- Welding: The hot-wedge welder is inserted into the overlap. As it travels automatically along the seam, the heated wedge melts the opposing surfaces, and the pressure rollers immediately fuse them together. A competent operator guides the machine to ensure it tracks straight and maintains a consistent pace. This process creates a double track weld with a small air channel in the middle, which can be tested for continuity.

Extrusion Welding
This manual method is used for repairs, patches, and welding around pipes, sumps, and corners.
- Shirye-shiryen saman: The area to be welded must be lightly abraded with a grinder to remove the oxidized surface layer and create a rough texture for the molten plastic to bond to. The area must then be cleaned of all dust. For membranes thicker than 2mm, the edge of the patch should be beveled to a 45° angle to allow for a stronger weld.
- Tacking: The patch or boot is temporarily tacked into place using a hot air gun.
- Welding: The operator uses the extrusion walda to lay a continuous bead of molten HDPE over the prepared seam. The operator must move at a steady speed, applying consistent pressure with the welder's Teflon shoe to ensure a solid, void-free weld. The extrudate should flow out evenly on both sides of the bead, indicating good fusion.

5. Welding Parameter Guide: Thickness, Temperature, and Speed Reference
Achieving a perfect weld requires balancing three key variables: temperature, speed, and pressure. These parameters are not fixed; they depend on the geomembrane thickness and ambient weather conditions. The values below are a general starting point for trial welds, but final settings must always be confirmed by destructive testing.
| Membrane Thickness | Welder Type | Recommended Temperature Range (°C) | Recommended Speed Range (m/min) | Bayanin kula |
|---|---|---|---|---|
| 0.5 mm - 1.0 mm | Small Hot-Wedge | 280 - 360 | 1.5 - 2.5 | Requires lower pressure to avoid thinning the material. Very sensitive to overheating. |
| 1.5 mm | Standard Hot-Wedge | 300 - 400 | 1.0 - 1.8 | This is the most common range for many landfill and environmental projects. |
| 2.0 mm - 2.5 mm | Large Hot-Wedge | 350 - 450 | 0.8 - 1.5 | Requires higher pressure and temperature to ensure full fusion through the thicker material. |
| Extrusion Welding | Handheld Extruder | 220 - 280 (Extrudate) / 300 - 350 (Hot Air) | 0.2 - 0.5 | Speed is manually controlled. Focus on a consistent bead and even flow of extrudate. |
Important Note: Colder ambient temperatures require higher welding temperatures and/or slower speeds. Hotter ambient temperatures require lower welding temperatures and/or faster speeds. Always perform a trial weld to calibrate.
6. Quality Control and Field Testing Methods (ASTM Standards)
QC is not an afterthought; it is an integral part of the installation process. Every inch of weld must be proven to be leak-free. We use a combination of non-destructive and destructive testing methods based on internationally recognized ASTM standards.
Gwajin mara lalacewa (NDT)
NDT is performed on 100% of all field seams to ensure their continuity.
- Air Pressure Test (ASTM D5820): This test is used for double-track fusion welds. The air channel between the two welds is sealed at both ends, and a needle is inserted. The channel is pressurized to a specified level (e.g., 25-30 psi) and monitored for 5 minutes. A loss of pressure indicates a leak in the seam.
- Vacuum Box Test (ASTM D5641): This method is used for all extrusion welds. A soap solution is applied to the seam, and the vacuum box is placed over it, creating a seal with its rubber gasket. A vacuum is pulled. If bubbles appear in the soap solution, it indicates a leak.

Gwajin lalata (DT)
Destructive tests are performed on the trial welds made at the start of each day and typically every 4-5 hours of production welding. A sample approximately 30 cm long and 2-3 cm wide is cut from the test seam and tested for both peel and shear strength using a field tensiometer (ASTM D6392). The weld must hold, and the failure must occur in the parent material (a "[Film Tear Bond" ko FTB), ba a cikin walda kanta ba. Wannan yana tabbatar da sigogin walda daidai ne.
7. Gano da Shirya matsala na gama-gari na walda
Even experienced technicians can encounter issues. Knowing how to identify and correct them immediately is a sign of a professional crew.
Common Welding Flaws
- Cold Weld: The weld can be peeled apart by hand. It looks dull or has an uneven surface.
- Cause: Temperature is too low or speed is too high.
- Magani: Increase temperature and/or decrease speed. Re-weld the area after preparing the surface.
- Overheated Weld (Burnt Weld): The weld area is scorched, brittle, and may have smoke trails.
- Cause: Temperature is too high or speed is too slow.
- Magani: Decrease temperature and/or increase speed. The damaged section must be cut out and repaired with an extrusion-welded patch.
- "Fishmouth" or Wrinkle: A wrinkle in the sheet gets folded into the seam, creating a channel for leakage.
- Cause: Improper material layout or wrinkles in the sheet.
- Magani: Cut the fishmouth flat along the seam, and then cap the entire area with an extrusion-welded patch.
- Uneven Extrudate Flow: For extrusion welds, the bead of molten plastic is inconsistent or has gaps.
- Cause: Inconsistent travel speed, improper surface preparation, or an issue with the extruder.
- Magani: Grind off the bad weld, re-prepare the surface, and re-weld, focusing on consistent speed and pressure.
8. Safety Measures and Best Practices During Installation
A geomembrane installation site is a construction zone with unique hazards. Safety must be the top priority for every member of the crew.
- Personal Protective Equipment (PPE): All personnel must wear appropriate PPE, including hard hats, safety glasses, steel-toed boots, and gloves, especially when handling hot equipment.
- Electrical Safety: Welding equipment draws a lot of power. All generators, cables, and connections must be in good condition, properly grounded, and kept away from water.
- Handling Hot Equipment: Welders operate at extremely high temperatures (up to 450°C). They must be handled with care and placed on designated heat-resistant stands when not in use. Never leave a hot welder unattended on the geomembrane.
- Weather Conditions: Installation must halt during rain, high winds, or other adverse weather. Wind can lift panels, creating a serious safety risk and potentially damaging the liner. Welding in extreme temperatures (below 4°C or above 35°C) requires special procedures and frequent trial welds.
- gangara: Working on slopes presents a slip-and-fall hazard. Ropes and safety harnesses may be required.
9. Final Verification and Key Takeaways for Long-Term Performance
The final steps of the installation lock in the quality of the work and provide the documentation needed for project sign-off.
- Final Inspection: A thorough visual inspection of the entire lined area is conducted. All welds are checked, and any identified defects are marked, repaired, and re-tested.
- Tsayawa: In anchor trenches, the geomembrane is laid into the trench, and the trench is carefully backfilled with compacted soil to provide a permanent mechanical termination for the liner system.
- Backfilling and Protection: As soon as practical after welding and QC are complete, the protective cover layer (soil, sand, or geotextile) should be placed. This protects the geomembrane from UV exposure, temperature swings, and mechanical damage.
- Takardun: Meticulous records are essential. The final documentation package should include as-built drawings showing a map of all panels and seams, a log of all destructive and non-destructive test results, and a record of all repairs.
Ƙarshe
A successful HDPE geomembrane installation is a testament to precision, expertise, and a systematic approach. It is not just about laying down plastic; it's about building a seamless, high-integrity containment system from the ground up. By following these steps—from meticulous site preparation to rigorous quality control—you ensure that the superior properties of the HDPE material are fully realized, providing robust, reliable, and long-lasting protection for your critical project.