Geocells create a powerful three-dimensional confinement system, but this strength is only realized when they are installed correctly. Proper installation isn't just about following steps; it's about transforming a flat, flexible panel into a robust, load-bearing structure.
This comprehensive guide details the step-by-step process for professional geocell installation, covering everything from site preparation to final inspection. We will explore best practices for load support, slope protection, and channel lining applications, ensuring you avoid common pitfalls and maximize the long-term performance of your geocell system.
En tant que fournisseur de géosynthétiques, I have seen firsthand how meticulous installation leads to project success, while shortcuts lead to premature failure. This guide distills years of field experience into practical, actionable advice to help you get it right the first time. The difference between a high-performing geocell system and a failed one often comes down to the quality of the installation.
Pre-Installation Planning and Site Assessment
Before the first geocell panel is ever unrolled, thorough planning and a detailed site assessment are crucial. This foundational stage sets the project up for success by ensuring the design is appropriate for the site conditions and that all necessary materials and equipment are ready.
Site Investigation
A comprehensive understanding of the project site is non-negotiable. Key factors to investigate include:
- Subgrade Soil Conditions: The type of soil you are building on directly impacts the preparation required. Soft clays may require remediation, sandy soils need careful confinement, and rocky subgrades need to be cleared of sharp protrusions that could damage the geocell. A standard soil classification and strength test will inform the design.
- Drainage and Groundwater: Assess the groundwater level and natural drainage patterns. High water tables or poor drainage can saturate the subgrade, compromising its strength. For installations on soft ground like swamps or tidal flats, a primary drainage ditch system may be necessary to dewater the area before work begins.
- Existing Topography: For slope protection projects, accurately measure the slope angle and height. Steep slopes (e.g., greater than 1:1) will require taller geocells, more aggressive anchoring, and specific top-down installation techniques compared to gentler slopes.
Design Parameters Review
Carefully review the project's engineering plans. Verify that the specified geocell material and dimensions are aligned with the site conditions and load requirements.
- Geocell Material and Dimensions: Confirm the polymer type (e.g., HDPE), cell height, and weld spacing. Taller cells provide greater confinement and are used for heavier loads or steeper slopes.
- Panel Layout: Understand the planned orientation of the geocell panels. On slopes, they are typically installed with the longest dimension running down the slope. For roadways, the orientation should optimize load distribution.
- Load Requirements: Re-confirm the expected traffic loads (e.g., vehicle weight, frequency) for pavement applications to ensure the chosen geocell and infill combination can support them.
Material and Equipment Preparation
Gather all necessary materials and equipment before starting work.
- Required Materials:
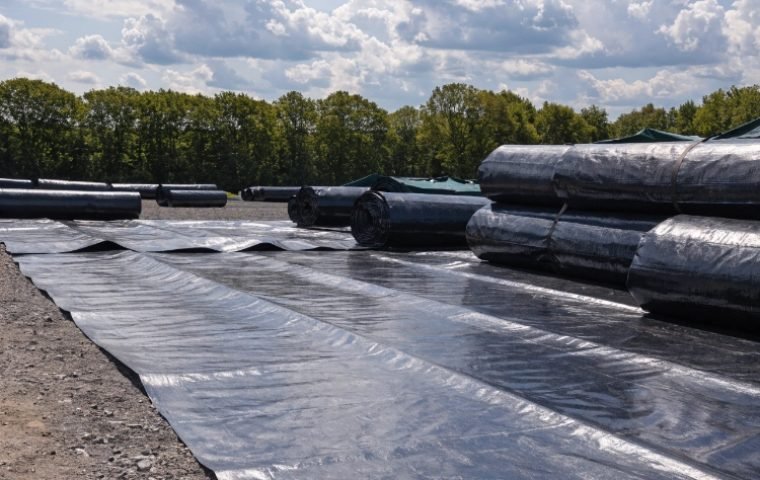
- Geocell panels
- Anchors (J-stakes, rebar, or engineered anchors as specified)
- Connecting hardware (use manufacturer-approved connectors, NOT zip ties or staples)
- Separation/filtration geotextile (if required by the design)
- Specified infill material (gravel, sand, topsoil, etc.)
- Common Equipment:
- Excavator, backhoe, or loader for earthwork
- Grader for leveling
- Vibratory plate compactor or roller
- Tools for cutting and fastening
Préparation du sol de fondation
The geocell system is only as strong as the ground it rests upon. Preparing a stable, uniform subgrade is arguably the most critical step in the entire installation process.
Clearing and Excavation
Begin by clearing the area of all vegetation, topsoil, rocks, tree roots, and debris. Any object larger than 50mm or with sharp edges must be removed, as it can puncture the geocell or create a void beneath it. Excavate the area to the depth specified in the design plans, ensuring you reach a stable soil layer.
Subgrade Leveling and Compaction
The subgrade must be smooth, uniform, and well-compacted to provide consistent support. Use a grader or hand tools to create an even surface with no depressions or humps, which could cause the geocell to be suspended in the air.
Once leveled, the subgrade must be compacted to the required density, typically at least 95% of the Standard Proctor Density. This prevents future settlement and ensures the loads transferred through the geocell are distributed onto a strong foundation. For very soft subgrades, a settlement observation period may be needed after initial compaction before proceeding.
Drainage Measures
If the site investigation revealed poor drainage or a high water table, proactive drainage measures are essential. This might involve installing a sub-drainage layer of open-graded stone or placing perforated drainage pipes to carry water away from the foundational soils. Keeping the subgrade dry is paramount for long-term stability.
Geotextile Installation (If Required)
In many applications, especially over fine-grained soils or where good drainage is critical, a separation geotextile is installed directly on the prepared subgrade before the geocells are deployed.
The geotextile serves several functions:
- Séparation: It prevents the granular infill material inside the cells from mixing with the fine-grained subgrade soil.
- Filtration: It allows water to pass through but stops soil particles from migrating, preventing clogging of drainage layers.
- Renforcement: In some cases, it can provide an additional layer of tensile strength.
When installing the geotextile, ensure panels overlap according to the design specifications (typically 300-500 mm) and are securely anchored to prevent movement. The fabric should be laid flat and be free of wrinkles or folds.
Geocell Deployment and Expansion
This is the stage where the three-dimensional structure begins to take shape. Precise positioning and uniform expansion are key to achieving the specified confinement.
Panel Positioning and Expansion
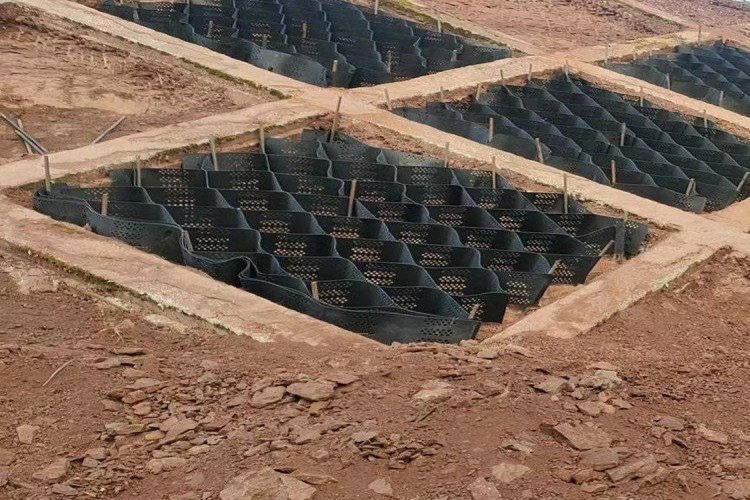
Place the collapsed geocell panels at their designated starting point. Before expanding, it’s often helpful to drive temporary stakes (e.g., 3-5 cm diameter bamboo or wood wedges) into the ground at the starting edge, corresponding to the geocell's weld spacing. This provides a fixed point to pull against.
Expand the geocell panel by pulling it open like an accordion until it reaches its specified dimensions. It is absolutely critical that every cell is fully opened into its characteristic hexagonal shape. Check for any collapsed or distorted cells. If the panel is not fully expanded, it will not provide the intended confinement and structural support.
Anchoring and Fixation
Once expanded, the geocell must be securely anchored to the ground to hold its shape during infill and to prevent sliding, especially on slopes.
- Anchor Types: The type of anchor depends on the application. J-stakes or rebar are common for flat ground and moderate slopes, driven through the cell walls into the subgrade. For very steep slopes or hard ground, engineered anchors like duckbill anchors or rock bolts may be required.
- Anchor Spacing: Follow the design plan for anchor spacing. Spacing is typically denser on slopes and along the perimeter of the installation. Inadequate anchoring is a leading cause of installation failure.
- Connecting Panels: Where multiple geocell panels meet, they must be securely connected to form a single, continuous system. Use only manufacturer-approved, high-strength connectors designed for this purpose. Never use cable ties or industrial staples. These materials will rust, degrade, and fail over time, compromising the integrity of the entire system. From my experience in troubleshooting failed projects, improper connection is a common and costly mistake.
Infill Material Selection and Placement
Le infill material works in combination with the cell walls to create the composite structure. The choice of infill and the placement method are critical for performance.
Infill Material Types
The infill should be chosen based on the application's load and drainage requirements.
- Heavy Loads (e.g., Ports, Haul Roads): Use high-quality, angular crushed stone (e.g., 19 mm aggregate). The angularity provides excellent interlock and shear strength.
- Moderate Loads (e.g., Parking Lots, Access Roads): Well-graded sand and gravel mixes are suitable.
- Light Loads / Erosion Control: Compacted native soil or topsoil can be used, particularly if vegetation is desired.
- Special Cases: For very high load applications or channel protection, the geocells can be filled with concrete.
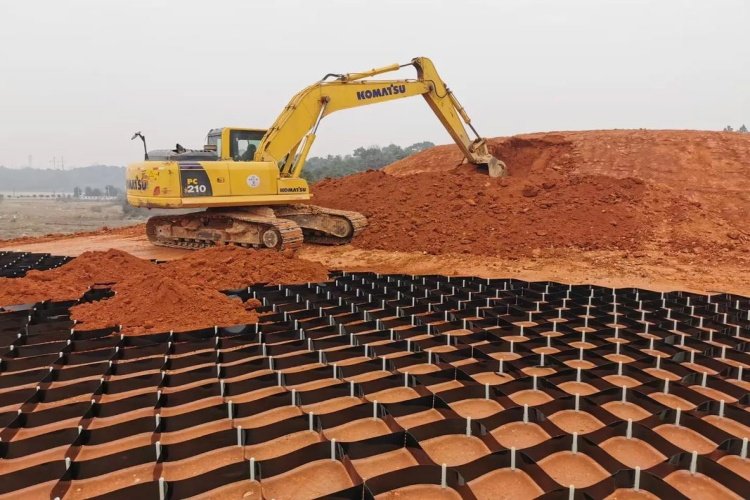
Infill Placement Procedures
The goal is to fill the cells without disturbing or damaging them.
- Filling Sequence: Begin filling from the anchored front of the panel and work backwards, or from the top of a slope and work downwards. This prevents the geocells from being pushed out of position.
- Equipment Movement: Restrict heavy equipment from driving directly on unfilled or partially filled geocells. Use a front-end loader or excavator with a long reach to place material into the cells.
- Overfilling: It is critical to overfill the geocells slightly, with the initial infill height being 5-10 cm above the top of the cell walls. This extra material accounts for settlement during compaction, ensuring the final surface is flush and the tops of the cells are confined.
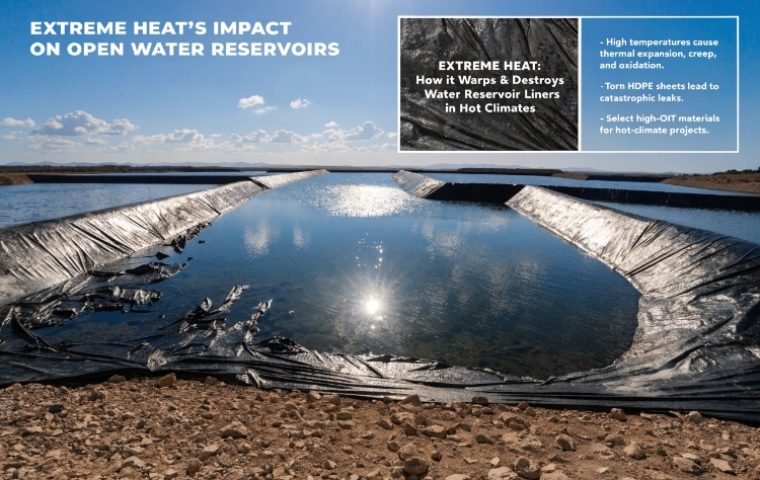
- Timeliness: Once deployed, geocells should be filled as soon as possible, ideally within the same day. Prolonged exposure to direct, intense UV sunlight can cause HDPE to become brittle and degrade over time.
Compaction Requirements
Compaction locks the infill material into place, creating a dense, stable surface.
- Equipment: A vibratory plate compactor is ideal for most granular infills. For larger areas, a small vibratory roller can be used, provided it does not damage the cell walls.
- Procedure: Compact the infill in a systematic pattern, making at least three passes over the entire area. Ensure adjacent passes overlap to guarantee uniform compaction. Be careful not to over-compact, which can sometimes "pump" fine material from the subgrade up into the cells if a geotextile is not used.
Final Inspection and Quality Control
After compaction is complete, conduct a final inspection to ensure the installation meets all quality standards.
Quality Control and Inspection Checklist
- Surface: The final surface should be level and free of depressions.
- Cell Confinement: No geocell walls should be visible at the surface. If they are, it indicates insufficient overfilling or under-compaction, and more infill should be added and re-compacted.
- Infill Density: The surface should feel firm underfoot with no loose areas.
- Anchors: All anchors should remain firmly in place.
- Elevation: Check key elevations with a survey instrument to confirm the final surface meets the design grades.
Installation Variations by Application
While the core principles are the same, different applications have unique considerations.
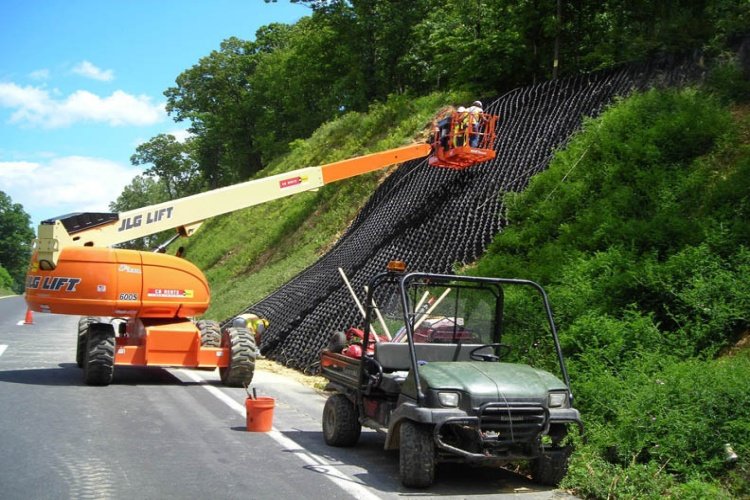
Slope Protection and Erosion Control
- Installation Direction: Always work from the top of the slope downwards. Anchor the geocell panels securely in a trench at the crest of the slope, then expand them downhill. This uses gravity to your advantage.
- Infill Placement: Fill the cells from the top down. Dropping material from a great height (more than 1 meter) can damage the cells. Use a chute or a loader with a long reach to control the placement.
Heavy Load Areas (Ports, Yards)
- Geocell Selection: Use taller geocells (e.g., 150 mm or 200 mm) to provide a deeper, more robust foundation.
- Ancrage : An aggressive anchoring system is required to resist the immense shear forces from braking and turning vehicles.
- Infill: Only high-quality, angular crushed stone or concrete should be used to achieve the necessary load-bearing capacity.
Conclusion
The exceptional performance of geocell systems is a direct result of the powerful synergy between the cell walls and the infill material. This synergy can only be achieved through a meticulous, step-by-step installation process. By investing time in thorough site preparation, uniform expansion, secure anchoring, and proper infill/compaction techniques, you are not just installing a product—you are building a durable, high-performance composite structure that will deliver its designed benefits for years to come.