You're ready to install your geomembrane, but the ground isn't perfect. Skipping the final prep seems like a way to save time, but it's a mistake that can ruin your entire project.
Yes, an uneven subgrade is one of the biggest causes of geomembrane failure. Sharp objects can puncture the liner, depressions create stress points that tear, and wrinkles lead to faulty welds and leaks, compromising the entire seepage control system.
I have shipped containers of geomembrane to projects all over the world, and I can tell you this: the best liner in the world will fail on a poorly prepared foundation. I've seen expensive projects leak within weeks simply because rocks and debris were left under the liner. Proper subgrade preparation isn't an optional step; it is the most critical insurance you have for a long-lasting, leak-free system. Let's break down exactly why it's so important and how to do it right.
Why does subgrade flatness matter before geomembrane installation?
You might think the geomembrane is tough enough to handle a few bumps and dips. Ignoring them will lead to hidden damage that only shows up later as a costly, hard-to-find leak.
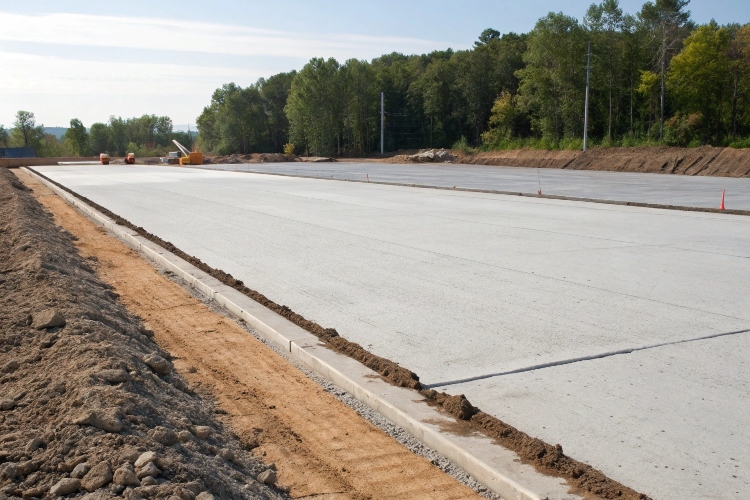
A flat subgrade ensures the liner is evenly supported. It eliminates concentrated stress from bumps that cause punctures and prevents the liner from stretching over voids, which leads to tears and seam failures over time.
How a Bad Foundation Destroys Your Liner
From my experience, the failure of a geomembraanvoering can almost always be traced back to the ground it was laid on. A perfectly smooth, flat surface allows the liner to perform its job without any external stress. An uneven surface, however, creates multiple points of failure.
-
It Prevents Punctures and Tearing
Any sharp object left on the subgrade—a rock, a tree root, even a hard clump of dirt—becomes a pressure point. The weight of the water or soil on top of the liner will eventually force that sharp point right through the material. Depressions or voids are just as bad. The liner will stretch to bridge the gap, placing it under constant tension. Over time, this stretching weakens the material and can lead to a tear, especially at the edge of the depression. -
It Ensures Weld Integrity
When you weld two panels of geomembrane together, the seam needs to be perfectly flat and clean. If the ground underneath is uneven, it's nearly impossible to get a good, continuous weld. Wrinkles and folds create weak spots that are prone to leak. A flat subgrade ensures your seams are as strong and leak-proof as the liner itself.
What problems can occur if the foundation surface is uneven or has sharp objects?
You see a few small stones or some uneven patches on the ground. You think, "The liner is thick, it will be fine," but this assumption leads directly to system failure.
Sharp objects cause immediate punctures. Uneven ground leads to long-term fatigue cracks from stress. Wrinkles in the liner trap water, accelerating aging, and poor welds at uneven spots create guaranteed leak paths.
A Catalog of Common Failures
When I talk to contractors about failed projects, the stories are always the same. The problems started before the liner was even unrolled. It's crucial to understand that an unprepared subgrade doesn't just create one problem; it creates a variety of failures that destroy your seepage control.
Here are the most common issues I see:
| Cause | Immediate Problem | Long-Term Consequence |
|---|---|---|
| Sharp Rocks, Roots, Debris | Puncture during or after install | A direct and immediate leak path |
| Holes or Depressions | Liner stretching and stress | Material fatigue, rips, and cracks |
| Uneven Surface (Bumps & Dips) | Wrinkles and folds in the liner | Poor welding, water getting trapped |
| Hard Clods of Soil | Concentrated pressure points | Accelerated aging and eventual puncture |
These issues are not just possibilities; they are virtual certainties on an unprepared site. The initial damage might be small, but the constant pressure from water and soil will turn a tiny weak spot into a major leak.
How should I prepare and level the base to ensure effective seepage control?
You know you need a flat base, but you are not sure of the exact process. Doing it improperly is just as bad as not doing it at all.
Follow a three-step process: First, clean the subgrade of all debris. Second, level the ground by filling and compacting any low spots. Finally, install a 10-15cm cushion layer of sand or fine soil.
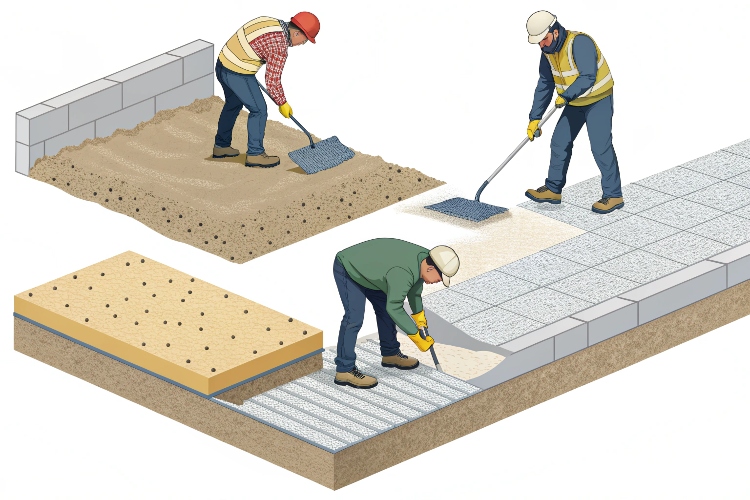
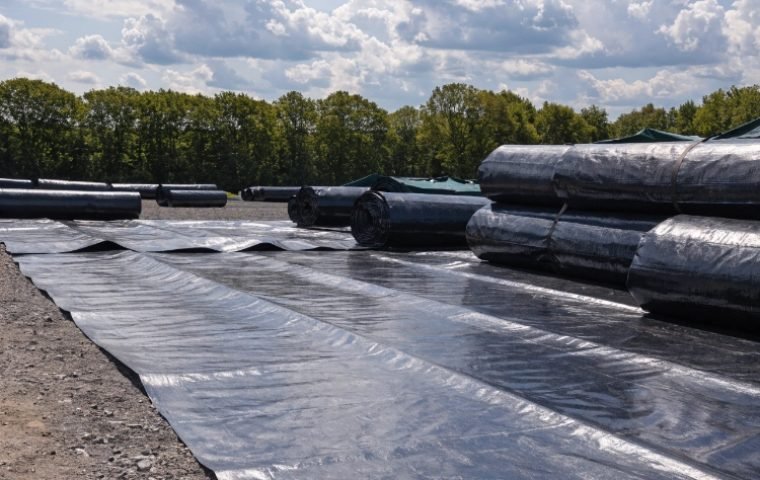
The Three-Step Method for a Perfect Subgrade
Over the years, our most successful clients have all used this simple but effective process. It guarantees a foundation that will protect your investment and ensure your liner lasts for decades.
-
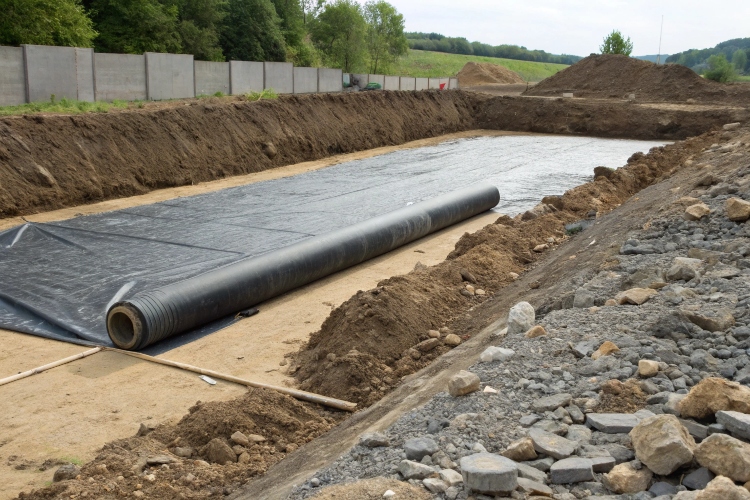
Step 1: Thorough Cleaning
This is the most important step. Walk the entire area and remove everything that shouldn't be there: rocks, roots, branches, construction debris, and even large weeds. Any hard soil clods should be broken up until they are no bigger than 2cm. The goal is a surface free of anything that could puncture the liner. -
Step 2: Leveling and Compaction
Once the area is clean, fix any unevenness. For small dips (less than 3cm), fill them with fine soil or sand and compact the area firmly. For larger holes or uneven slopes, you need to backfill with soil in layers, compacting each layer (about 30cm thick at a time) before adding the next one. -
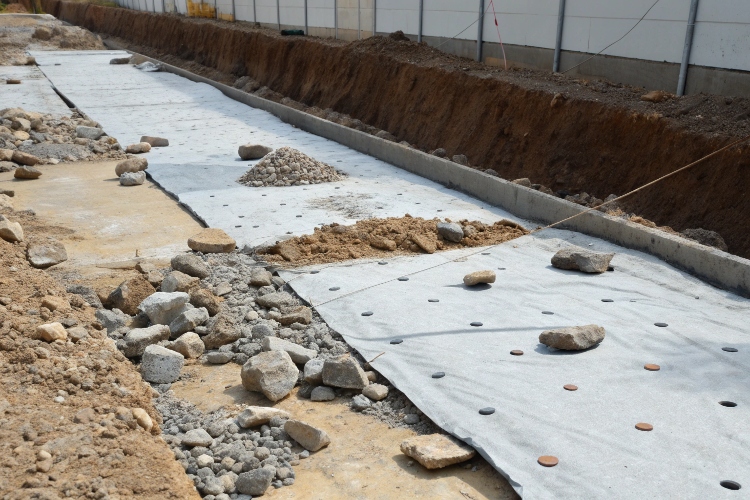
Step 3: Add a Cushion Layer
This is your final insurance policy. Spread a 10-15cm thick layer of fine soil or sand evenly across the entire prepared area. This cushion layer protects the geomembrane from any minor imperfections that might remain in the base soil. If your site is particularly rocky and you cannot remove all the sharp stones, you should also lay a nonwoven geotextile (at least 200g/m²) on top of this cushion layer for double protection.
What inspection steps help confirm that the subgrade is ready for geomembrane placement?
You've followed the steps, and the subgrade looks good. But how can you be absolutely sure it's ready, so you don't face problems after the liner is down?
Use the "Three Flats" standard: the surface should be flat, the texture firm, and it should be free of sharp objects. Verify flatness with a 2-meter straightedge; the gap should not exceed 3cm.

The Final Quality Check
Before a single roll of geomembrane is brought onto the site, I always advise my clients to perform a final inspection. This five-minute check can save you from days of headaches later on. Here’s how you confirm the subgrade is ready.
-
The "Three Flats" Rule
This is a simple standard we use in the industry. The ground must be:- Flat Surface: No obvious bumps or depressions.
- Firm Texture: No loose, soft soil that could settle later.
- Free of Sharps: Nothing that feels sharp to the touch.
-
The Tools for Inspection
You don't need fancy equipment. Your eyes, hands, and one simple tool are enough.- Visual Check: Do a final walk-through of the entire area, looking for any missed debris or uneven spots.
- Hand Check: In several random spots, sweep your hand across the surface of the cushion layer. It should feel smooth, with no sharp or jabbing points.
- Straightedge Check: Lay a 2-meter long, straight piece of wood or metal on the surface. Look for gaps between the straightedge and the ground. If you see any gaps larger than 3cm, that area needs to be re-leveled.
Also, always plan this work for good weather. Trying to prepare a subgrade in the rain leads to muddy, uncompactable soil that will cause problems later.
Gevolgtrekking
A clean, flat, and protected subgrade is not an optional extra; it is the most critical factor for a successful geomembrane installation. Taking the time to prepare the foundation properly will save you money.