A leak in your geomembrane containment system can be a project manager's nightmare, threatening environmental compliance and operational stability. The immediate thought is often a costly, full-scale replacement. But what if there was a more efficient, reliable way?
This comprehensive technical guide details the science and methodology behind professional geomembrane repair. We cover everything from advanced leak detection and damage assessment to specific repair procedures for underwater and dry conditions, ensuring you can restore your system's integrity quickly and cost-effectively.

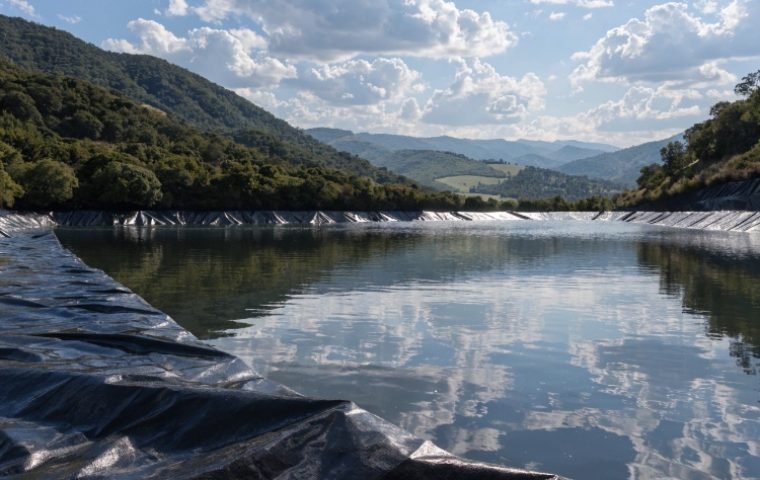
Your geomembrane liner is the heart of your containment facility, whether it's a landfill, mining heap leach pad, or agricultural pond. Understanding its vulnerabilities and the proper methods for maintenance is not just about fixing holes—it's about ensuring the long-term safety and performance of your entire project. Let’s dive into the common causes of failure and how to decide the best path forward.
1. Why Do Geomembranes Leak? Understanding When Repair Is Better Than Replacement
In our experience handling projects globally, we find that most geomembrane leaks don't signal the end of the liner's life. In fact, in over 80% of leakage cases we encounter, a scientific and durable repair is not only possible but also the most economically sound decision. A complete replacement is a massive undertaking involving drainage, excavation, removal, and re-installation, leading to extensive downtime and expense. Repair, on the other hand, is a targeted surgical approach.
The feasibility and long-term success of a repair, however, depend heavily on the quality of the original material. Premium geomembranes, made from 100% virgin resin, exhibit superior weldability, stress-crack resistance, and chemical stability. When damage occurs, these high-grade materials are far more forgiving and reliable to patch or re-weld compared to lower-quality liners made with recycled content, which can become brittle and resist proper thermal fusion over time. Choosing a high-quality liner from the start is an investment in future "repairability," ensuring that any necessary maintenance is fast, effective, and restores the system to its original performance standards.
2. Common Geomembrane Damage Types, Root Causes, and Early Warning Signs
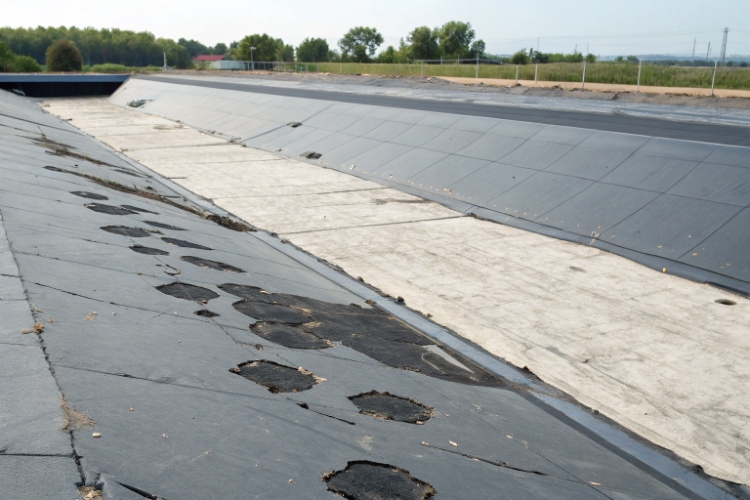
Damage to a geomembrane is rarely a sudden, catastrophic event. It often begins as a small, unnoticed issue that escalates over time. Identifying the type of damage and its root cause is the first step in formulating an effective repair strategy. By recognizing the early warning signs, you can intervene before a minor issue compromises your entire containment system.
Each type of damage has a distinct signature and cause, ranging from installation errors to environmental stressors.
Here’s a breakdown of the most common issues we see in the field:
| Type of Damage | Common Causes | Typical Signs & Early Warnings |
|---|---|---|
| Weld Separation | Improper welding parameters (temperature, speed, pressure), moisture or dust trapped in the seam during installation. | Localized wet spots, swelling or "whales" beneath the liner, visible gaps along the seam line. |
| Scratches & Punctures | Sharp stones in the subgrade, accidental contact with machinery, animal burrowing, or dropped tools. | Small, isolated seepage points or damp patches. Often difficult to spot without specific testing. |
| Aging & Cracking | Prolonged exposure to UV radiation (sunlight), extreme temperature cycles, or aggressive chemical contact. | The surface appears dull, loses its sheen, and develops micro-cracks or brittleness upon flexing. |
| Joint Failure | Poor sealing around pipe penetrations, concrete structures, or in anchor trenches due to differential settlement or sealant failure. | Obvious leakage at connection points, erosion around pipes, or visible tearing at anchorages. |
| Stress Cracking | High mechanical stress concentrated in one area, often due to poor subgrade preparation or folding during installation. | Fine cracks that grow over time, often perpendicular to the direction of stress. |
A critical point to remember is that damage often starts as a micro-leak. Without timely repair, this slow seepage can erode the subgrade, creating voids. This can lead to liner slippage on slopes or the formation of large "whales" (uplift) on flat areas, drastically increasing future repair complexity and costs. This is why our premium geomembranes, made with superior HDPE or LLDPE resins, are engineered for high tensile strength and puncture resistance to minimize these initial risks.
3. How to Diagnose Geomembrane Damage: Leak Detection and Pre-Repair Evaluation
Once you suspect a leak, a systematic diagnosis is essential. You cannot effectively repair what you cannot find and measure. Modern leak detection technologies allow for incredibly precise, centimeter-level accuracy, eliminating guesswork and minimizing the area of disturbance required for a repair. This pre-repair evaluation phase is critical for classifying the damage and planning the most effective response.
3.1 What Are the Best Leak Detection Methods for Geomembranes?
We recommend a combination of methods depending on the site conditions (e.g., covered or exposed liner, dry or submerged).
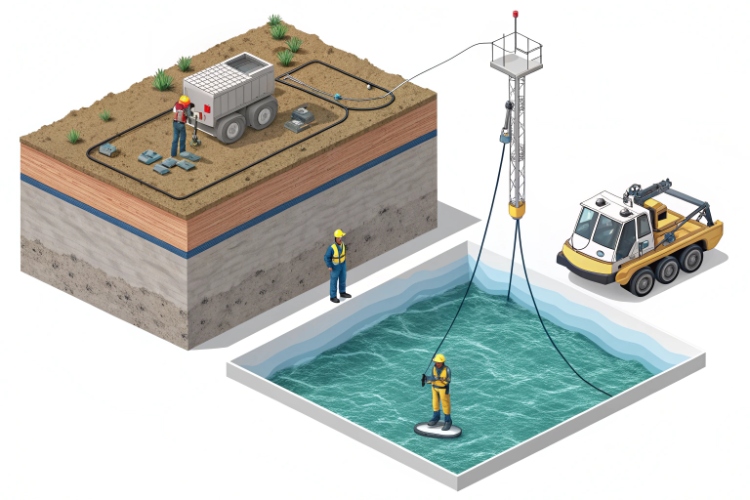
- Electrical Leak Location (ELL): This is the gold standard for exposed or soil-covered geomembranes. A low-voltage electrical current is applied across the liner surface. Since the geomembrane is an insulator, any current passing through to a ground probe indicates a breach. Specialized probes can then pinpoint the exact location of the hole. It is highly accurate and can detect pinholes that are invisible to the naked eye.
- Underwater Sonar or Video Inspection: For reservoirs, ponds, or tanks that cannot be drained, a Remotely Operated Vehicle (ROV) equipped with high-resolution sonar or a camera is used. Sonar can detect water anomalies caused by leaks, while a camera provides direct visual confirmation of tears or seam separations.
- Air Pressure Test (for Dual-Track Welds): During installation, seams created by a hot wedge welder often have a central air channel. This channel can be sealed at both ends and pressurized with air. If the pressure holds steady for a specified period (e.g., 5-10 minutes), the seam is confirmed to be leak-free. This is a primary CQA test.
3.2 Damage Classification: When to Repair vs. Replace
Based on the findings from the leak detection survey, we classify the damage to determine the appropriate response.
| Level | Damage Characteristics | Recommended Action |
|---|---|---|
| Level I (Minor) | Small punctures or cuts, typically less than 10 cm² in area. | On-site patch repair. This can be done with an adhesive patch for temporary fixes or, more preferably, a small welded patch for a permanent solution. |
| Level II (Moderate) | Larger tears, multiple small punctures in one area, or a short section of failed seam (under 1 meter). Area is between 10 cm² and 1 m². | Local welding and patching. This involves cutting out the damaged section and welding in a new piece of geomembrane material. |
| Level III (Severe) | Extensive areas of damage (>1 m²), long sections of seam failure, or widespread aging and cracking. | Partial replacement. A large section of the liner is removed and replaced. This requires drainage and is a significant undertaking, but still less disruptive than a full replacement. |
3.3 Preparation Before Repair: Steps to Ensure Long-Term Results
Proper preparation is non-negotiable for a durable repair. Before any welding or adhesive is applied, the repair team must:
- Clean the Surface: The area around the damage (at least 15-20 cm in all directions) must be thoroughly cleaned of all mud, water, dust, and oils. We typically use a soft cloth and a solvent like methanol or isopropyl alcohol that evaporates without leaving a residue.
- Abrade the Surface (If Needed): For older, slightly oxidized surfaces, a light abrasion with fine-grit sandpaper can remove the top layer and expose fresh material for a stronger weld.
- Mark and Document: The exact location, size, and type of damage must be marked and logged. Taking photographs before and after the repair is a critical part of the CQA/CQC record.
4. Underwater Geomembrane Repair: Methods, Adhesives, and Limitations
Repairing a geomembrane without draining the facility is a highly specialized task, often reserved for emergency situations or when dewatering is completely infeasible. While possible, it's important to understand the capabilities and limitations of this method.
Feasibility: Moderate. It's primarily effective for temporary or emergency sealing of small, localized punctures and tears. It is generally not considered a permanent solution equivalent to a thermal weld.
Recommended Method: The most common and reliable method for underwater repair involves a multi-step process performed by experienced commercial divers.
- Priprema površine: The diver first cleans the area around the leak using brushes to remove algae, sediment, and any biofilm. A clean surface is paramount for adhesion.
- Adhesive Application: A two-component underwater epoxy adhesive is used. These adhesives are specifically formulated to displace water from the surface and cure in a submerged environment. The two parts are mixed on the surface and sent down to the diver, who applies a generous layer over and around the damaged area.
- Patch Placement: A patch made of the same geomembrane material (e.g., HDPE) is then pressed firmly onto the adhesive. The patch should be oversized, extending at least 15 cm beyond the damage in all directions.
- Mechanical Reinforcement: To ensure the patch remains in place while the epoxy cures, mechanical clamping bars or significant weight is often applied over the patch for a set period.
Important Considerations & Ograničenja:
- Water Temperature: The curing time of epoxy adhesives is highly sensitive to temperature. In cold water (below 10°C), the curing process can slow down dramatically or even stall, requiring special cold-cure formulations.
- Diver Skill: This is not a job for amateurs. The diver must be trained in both commercial diving safety and the specifics of geomembrane repair.
- Adhesion Strength: While strong, the bond strength of an underwater epoxy patch will never equal that of a thermal weld performed in dry conditions. We consider it a high-quality temporary fix to stop a leak until a permanent, welded repair can be scheduled.
5. Dry-Area Geomembrane Repair: Hot Wedge & Extrusion Welding Procedures
When the geomembrane can be accessed in a dry condition, thermal welding is the undisputed best method for permanent repair. A properly executed weld effectively fuses the patch with the original liner, restoring the material's strength and impermeability as if the damage never existed. This is the standard procedure for critical applications like landfills, mining facilities, and canals.
Feasibility: High. This method provides a permanent solution with restored strength equal to or exceeding the parent material.
Standard Welding Repair Process:
- Prepare the Damaged Area: The damaged section is neatly cut out, typically into a circular or oval shape with no sharp corners, as corners can create stress concentration points.
- Prepare the Patch: A patch is cut from a new piece of identical geomembrane material. The patch must be larger than the cutout, allowing for an overlap of at least 10-15 cm on all sides for welding. The corners of the patch should also be rounded.
- Position and Weld: The patch is placed over the prepared area. Depending on the size and type of repair, one of two welding techniques is used:
- Zavarivanje vrućim klinom: For long, straight repairs or joining large panels. A machine with a heated metal wedge travels between the two layers of geomembrane, melting the surfaces while pressure rollers press them together to form a homogenous weld.
- Zavarivanje ekstruzijom: This is the most common method for patching. A handheld welder heats the base material and the patch with a jet of hot air while simultaneously extruding a molten bead of the same polymer. The technician lays this bead of molten plastic along the edge of the patch, fusing it completely to the liner below.
- Test the Repair:
- Non-destructive testing: Immediately after cooling, the seam is tested. For extrusion welds, a vacuum box is placed over the seam. The box is sealed against the liner, and a vacuum is pulled. A soap solution sprayed on the seam will bubble if any leaks are present.

The key advantage of thermal welding is its reliability. When performed by a certified technician using quality equipment, the repaired section becomes an integral part of the liner, ready to provide decades of service.
6. Pipe Penetration and Joint Sealing: Restoring Integrity at Critical Points
Pipe penetrations and connections to concrete structures are the most common locations for geomembrane leaks. These areas are complex because they involve joining a flexible material (the geomembrane) to a rigid one (a pipe or wall), creating a point of high mechanical stress from differential settlement, vibration, and thermal expansion/contraction. Restoring integrity here requires more than just a simple patch.
The first step is always to thoroughly inspect the existing seal. Is the sealant cracked and brittle? Is the geomembrane pulled away from the pipe? Has the "boot" or flange failed?
Standard Repair Procedure for Pipe Penetrations:
- Remove Old Sealant: All old, failed sealant material must be completely scraped and cleaned away. The surface of both the pipe and the geomembrane must be prepared—cleaned and abraded—to accept the new seal.
- Primary Seal Application:
- Pipe Boot / Flange: For a full restoration, a new pre-fabricated "pipe boot" is often the best solution. This is a cone-shaped piece of geomembrane that fits over the pipe and has a wide flange at the bottom that can be welded directly to the main liner.
- Mechanical Seal: A stainless steel clamping band can be used to secure the geomembrane tightly around the pipe, with a high-grade sealant like polyurethane or butyl rubber applied underneath to create a watertight gasket.
- Secondary Sealant Application: After the primary mechanical seal is in place, a secondary bead of flexible, UV-resistant polyurethane sealant is applied around the top edge of the joint. This acts as a final barrier against water and chemical infiltration.

The flexibility of our LLDPE and EVA geomembranes makes them particularly well-suited for these complex junctions. Their superior elongation and stress-crack resistance allow them to accommodate movement without failing, ensuring a more durable and long-lasting seal at these critical points.
7. Choosing the Right Repair Materials: A Comparative Guide
The success of a repair depends just as much on the materials used as on the technique. Using an incompatible or low-quality patch material can lead to premature failure of the repair. The patch material should always match the parent geomembrane, and any adhesives or sealants must be proven compatible.
As a supplier, we provide a full range of materials certified to international standards to ensure every repair is built to last.
| Material Type | Key Features & Najbolji slučaj upotrebe | Suitable Applications |
|---|---|---|
| HDPE Membrane (1.0–2.5mm) | Excellent chemical and UV resistance, high strength and stiffness. The best choice for long-term exposed applications. | Landfills, heap leach pads, secondary containment, exposed reservoir covers. |
| LLDPE / EVA Membrane | Superior flexibility and elongation, high stress-crack resistance. Excellent for applications with expected differential settlement. | Reservoirs, canals, tailings dams, decorative ponds, and complex geometries. |
| Two-Component Epoxy Adhesive | Cures underwater, provides a strong chemical bond. Formulated for emergency patching without dewatering. | Submerged punctures and small tears in ponds, tanks, and reservoirs. |
| Polyurethane Sealant | Remains highly elastic after curing, absorbs movement, and has excellent adhesion to both plastics and concrete. | Sealing around pipe penetrations, joints to concrete structures, and small cracks. |
| Netkani geotekstil | Used as a protective cushion layer beneath a repair patch in areas of high turbulence or erosion (e.g., water inlets) to prevent scour. | Reinforcement for repairs in fast-flowing water channels. |
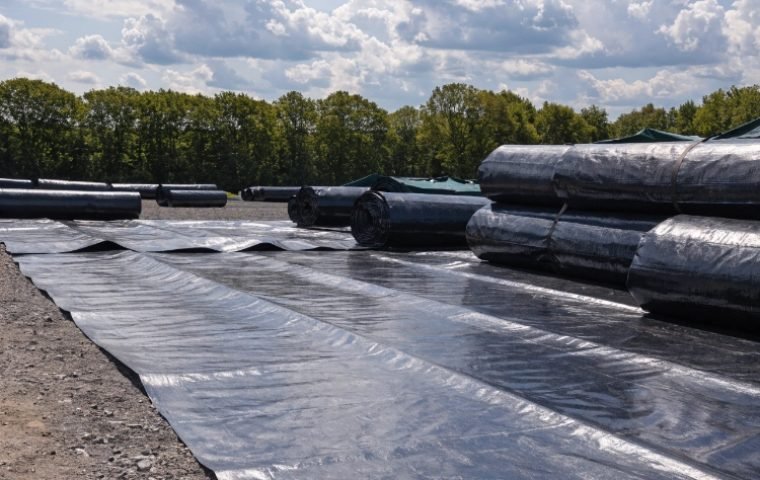
At Waterproof Specialist, we supply HDPE, LLDPE, and EVA geomembranes that comply with or exceed ASTM, ISO, and GB standards. We can customize the formulation for specific UV resistance, chemical compatibility, or even color to ensure that the repair materials integrate seamlessly with your existing liner, both functionally and aesthetically. Compatibility is key for a repair that lasts.
8. Post-Repair Testing and Documentation: Verifying the Fix
A repair isn't complete until it's been tested and documented. This Construction Quality Assurance (CQA) step is non-negotiable. It provides immediate confirmation that the leak has been sealed and creates a permanent record for future maintenance and warranty purposes. All testing should be performed according to established industry standards like those from ASTM International.

Here are the essential tests and their acceptance criteria:
| Test Item | Method | Acceptance Criteria |
|---|---|---|
| Visual Inspection | Close observation and touch by a certified technician immediately after the weld has cooled. | The repaired area must be free of wrinkles, bubbles, burn marks, or any signs of incomplete fusion. The patch should lay flat and be fully bonded. |
| Seam Integrity Test | Test vakuumske kutije for extrusion welds, or Air Channel Pressure Test for dual-track hot wedge welds. | Vacuum Box: No bubbles or loss of vacuum for at least 30 seconds. Air Channel: Pressure must hold steady within an acceptable drop-off range for 5-10 minutes. |
| Leak Detection Confirmation | For critical applications, a final Electrical Leak Location (ELL) survey over the repaired area confirms that no breach remains. | The test should show a complete absence of electrical continuity, indicating a successful seal. |
Recommended Documentation Package:
A professional repair should always conclude with a formal report. This documentation is invaluable for CQA/CQC compliance, facility management, and potential warranty claims. It should include:
- Repair Report: A detailed log with the date, location (GPS coordinates if possible), description of the original damage, repair method used, and technician's name.
- Photographic Record: Clear "before" and "after" photos of the repaired area.
- Material Certificates: Mill Test Reports (MTRs) for the patch material and batch numbers for any adhesives used, confirming they meet project specifications.
9. Preventive Geomembrane Maintenance: How to Avoid Future Leaks
The most cost-effective repair is the one you never have to make. A proactive preventive maintenance program can dramatically extend the life of your geomembrane liner and significantly reduce the risk of unexpected failures. While our geomembranes are built for durability, proper care and regular inspections are key to achieving a multi-decade service life.
Here are practical maintenance steps we recommend to all our clients:
- Control Site Traffic: Strictly prohibit dragging heavy or sharp objects across the liner surface. Designate specific walkways or use protective geotextile mats in high-traffic areas.
- Regular Visual Inspections: Walk the site quarterly or after major storm events. Look for signs of stress, erosion near anchor trenches, animal burrowing, or debris accumulation.
- Inspect Seams and Joints: Pay close attention to welded seams and mechanical connections at pipes and structures. These are the most likely points of failure. Look for any signs of peeling, cracking, or separation.
- Maintain Proper Drainage: Ensure that the drainage systems above and below the liner are functioning correctly. Water pressure building up beneath the liner (uplift) can cause massive "whales" that can stretch and rupture the membrane.
- Schedule Periodic Leak Surveys: For high-risk facilities like landfills or chemical ponds, we recommend a professional Electrical Leak Location (ELL) survey every 1-2 years to catch and repair pinhole leaks before they become significant problems.
- Manage Vegetation: Do not allow deep-rooted plants to grow near the liner, as their roots can eventually cause punctures.
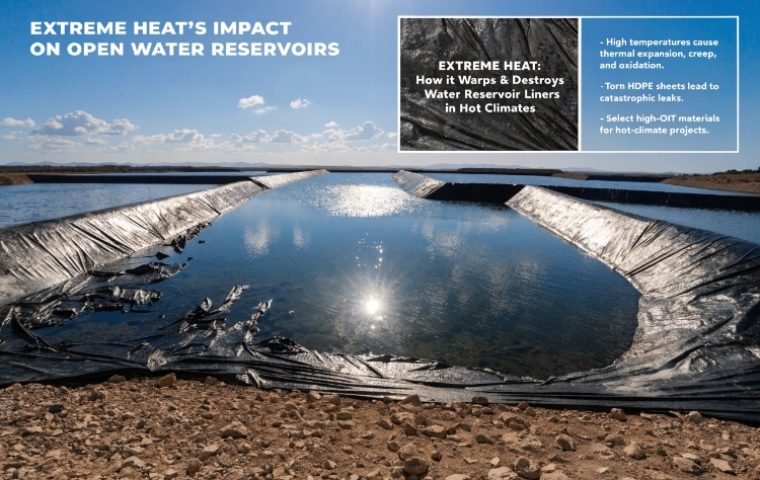
Stručni savjet: Investing in the right material from the start is the best form of preventive maintenance. Using a geomembrane made with 100% virgin HDPE resin and a robust UV stabilization package can add over 20 years to the liner's effective service life, especially in harsh, sunny climates.
10. Pricing, Lead Time, and Export Support for Repair Materials
When a leak occurs, time is of the essence. Project managers need to know not just how to fix it, but how quickly and cost-effectively they can get the necessary materials. Two questions we frequently answer are:
- "What is the price difference between new geomembrane rolls and smaller quantities for repair?"
- "How fast can you ship repair materials internationally?"
As a direct manufacturer and exporter, we are structured to support both large-scale installations and urgent repair needs. While buying in bulk for a new project always yields the lowest price per square meter, our repair material support offers unique value:
- Flexible MOQ: We understand that a repair might only require 100 or 500 square meters, not a full container. We offer flexible Minimum Order Quantities (MOQ) for repair materials to ensure you get exactly what you need without over-ordering.
- Certified Materials: All our repair materials, whether it's a small roll of HDPE or a kit of LLDPE patches, are certified to the same ASTM/ISO standards as our large-volume production, guaranteeing compatibility and quality.
- Fast-Track Production & Shipping: We can often prioritize smaller repair orders and prepare them for air or sea freight within days. A typical lead time for production is 1-2 weeks, and we can leverage our experience to manage customs documentation and logistics for rapid door-to-port delivery.
We routinely export to Southeast Asia, the Middle East, Africa, Latin America, and Europe, and our logistics team is an expert in navigating the documentation and shipping requirements for each region.
11. Frequently Asked Questions (FAQ)
Q1: Can geomembrane damage be repaired without draining the water?
A: Yes, for small punctures or tears. We can use a specialized underwater epoxy adhesive and a patch applied by professional divers. However, this is typically considered a high-quality temporary fix. For a guaranteed, long-term solution with full structural integrity, repairs using thermal welding in dry conditions are always recommended.
Q2: How long will a properly executed geomembrane repair last?
A: When a repair is performed using thermal welding (extrusion or hot wedge) with a compatible, high-quality material, the repaired section is expected to last as long as the original geomembrane itself—often 20 years or more. The weld fusesthe materials into a single, monolithic sheet.
Q3: Can we avoid major excavation to repair a leak under soil cover?
A: Absolutely. This is where Electrical Leak Location (ELL) technology is invaluable. It can pinpoint a leak to within a few centimeters, allowing for targeted excavation of a very small area (often just 1m x 1m) to access and repair the puncture, saving immense time and cost compared to blind trenching.
Q4: Can different brands or types of geomembranes be welded together?
A: It is sometimes possible, but it is strongly discouraged. The best and most reliable welds are achieved when joining materials of the same brand, type (e.g., HDPE to HDPE), and thickness. Different manufacturers use slightly different resin formulations and additives, which can result in a weak or inconsistent seam. We can test the compatibility of materials upon request and provide optimal welding parameters.
Conclusion: Repair Is About Restoring System Integrity, Not Just Fixing Holes
The ultimate goal of a repair is not just to plug a hole—it's to rebuild confidence in the integrity of your entire containment system. A high-quality geomembrane can and should provide decades of reliable service. Achieving that longevity depends on a partnership between premium materials and professional maintenance practices. By choosing durable, weldable, and UV-resistant membranes from the start, you ensure that your asset remains safe, compliant, and stable for years to come.
Get Technical Support and Free Samples
If your project is experiencing signs of a leak—local seepage, swelling, or seam separation—or if you are planning a new project and want to invest in a longer-lasting, easily repairable geomembrane, our team is here to help. Contact us for technical support, professional repair advice, and free material samples to verify our quality firsthand.